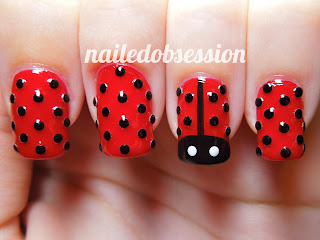
The next untried to be pulled from my stash by the random number generator was China Glaze 'Ruby Deer'. This red polish reminded me of ladybirds for some reason, so today I have a ladybird nail art tutorial for you!
 |
| Lamp light |
 |
| Lamp light |
Step 1: Apply your protective base coat and then apply a red polish to all of your nails.
Step 2: Taking a black striper or black polish and a nail art brush draw a straight line down the centre of your ring finger nail.
Step 3: Using a black polish paint a rounded tip on the same nail.
Step 4: Taking a white polish and a dotting tool, give the ladybird two eyes. If you're feeling brave you could give it a little mouth too.
Step 5: If you have round black studs, apply some to the ladybird's back. If you don't have studs use black polish and a dotting tool to make your dots.
Step 6: Apply some studs/dots to your other nails.
Step 7: Apply your clear top coat.
Fun fact: Ladybirds are the only insects that can touch me without causing me to shriek incessantly.


AMAZING!!! This looks super cute :)
ReplyDeleteLooks so cute!
ReplyDeleteI really liked that you use black studs! Adds some texture :)
ReplyDeleteI adore this nail look! I really want to give it a try, it'd look especially nice if you were wearing a LBD. It'd add a lovely bit of colour xx
ReplyDeleteAngelica [One Little Vice]
Thanks guys :)
ReplyDelete