To give you a bit of background info, 1Q32 (one-Q-thirty-two or ichi-kyu-san-ni) are a Japanese company specialising in gel polish. The company name is a word-play on the Japanese pronunciation of the year 1932 (ichi-kyu-san-ni), the year that the first air dry nail polish was born. 1Q32 claim to be different from other gels because they don't require basegel or topgel (hooray for saving time!), and leave no sticky residue after curing. Once again, I can't compare this to other products on the market, but I will give my thoughts on these characteristics.
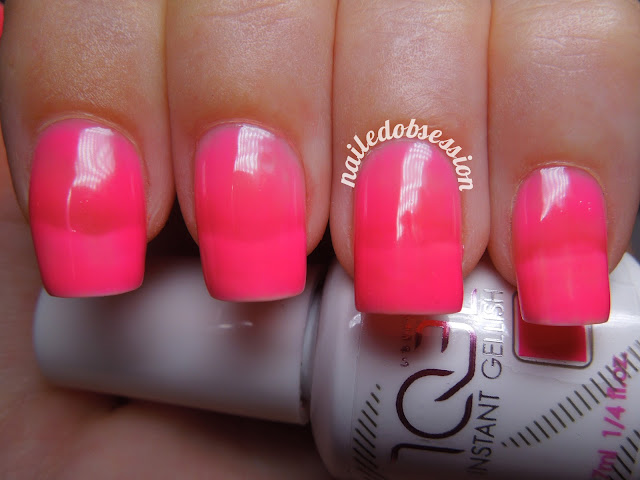
As there is no base or top gel required, you will only need 2 items to complete these gel nails, the coloured gel polish, and a UV or LED lamp (both types work with the 1Q32 polishes). The product I was sent for review was the BabyQ polish in colour QB51 which is a bright neon pink. I love pink, but wow this colour was so bright it was almost blinding! Better grab your sunglasses girls! I bought my LED lamp on ebay for about $10. It only does one finger at a time but since I wasn't sure if I was going to like doing gels I figured this was a good one to start out with.
 |
| LED lamp and 1Q32 Instant Gellish in QB51. |
To start off, push back your cuticles and give your nails a swipe with nail polish remover to remove any dust and oils. Once you've prepped your nails, apply a thin first coat of 1Q32 colour onto your nail, being careful to avoid the skin. If you do get some on your skin remove it before curing the polish under the lamp. The bottle indicates to place your nails under the lamp for 20-30 seconds for an LED lamp, and 60-120 seconds for a UV lamp. I used an LED lamp, but mine had a very low wattage of 0.5 watts so I found I had to leave my nail under for about 40 seconds. I found that the colour had set after 30 seconds, but I had to leave it for 40 before the sticky residue disappeared.
 |
| Nail under the LED lamp for 40 seconds. |
As you can see in my photo below, after one coat there is still obvious VNL and shrinkage at the tip. This is to be expected though as the first coat should be a thin one.
 |
| One coat of 1Q32. |
Apply a second coat of 1Q32 and repeat the curing steps under the lamp. Although it's not terribly obvious in my photo below, after two coats there was still a definite VNL (and those of you who know me will know that I can't stand VNL).
 |
| Two coats of 1Q32. |
Since there was still VNL, I decided to add a third coat of 1Q32 to my index and pinkie fingers. I wouldn't really suggest doing a third coat, as it starts to look a little thick which is never a good look. On my two middle fingers I added Emily de Molly's 'Violet Days' over the two coats of 1Q32 that I had cured in the previous steps. If you're going to use glitter polish I would recommend topping it with 1Q32's optional topgel.
 |
| Three coats of 1Q32 on index and pinkie fingers. |
Overall I think this a good product, however if I was going to buy any more colours I would want to know that they were opaque in 2 coats as I hate VNL with a passion. As the product promised, there was no sticky residue after I cured it for long enough, and there was no need for base or top gel as it didn't stain my nails and it was super shiny on it's own. Application was very smooth despite the polish's thick appearance and I found the brush very managable. I'm not sure if I'm a lover of gels just yet, since I change my nail colour frequently I don't think I would really benefit from the long-lasting characteristics that gels possess, however if I was going to give gels a proper go I would definitely consider buying more 1Q32 polishes.
To purchase or read more about 1Q32 Gellish polish jump over to their website. Alternatively, you can check out more reviews/photos/videos on their facebook page. They currently have a promotion running as well which might be worth checking out if you've been considering setting yourself up with a lamp.
Disclosure note: The product/s in this post were provided for review. This did not affect my opinion of the product/s.


